

This is a tutorial on how to apply a lineart onto a 3D model in blender. Blender is a powerful and free open source 3D modeling software. It is a great program for beginners as there are a lot of tutorials online for it. To really master blender, there are many shortcuts that can take a long time to get used to. I recommend learning some of the basic ones like adjusting the position of selected objects.
Learning how to turn 3D models into 2D images or applying a lineart in general can be helpful for diagram creation and documenting objects. They can be rendered into different styles (blueprints, cartoon, sketchy, etc.) depending on the purpose.
Step 1: Install blender
Step 2: Remove the default block, and import your obj

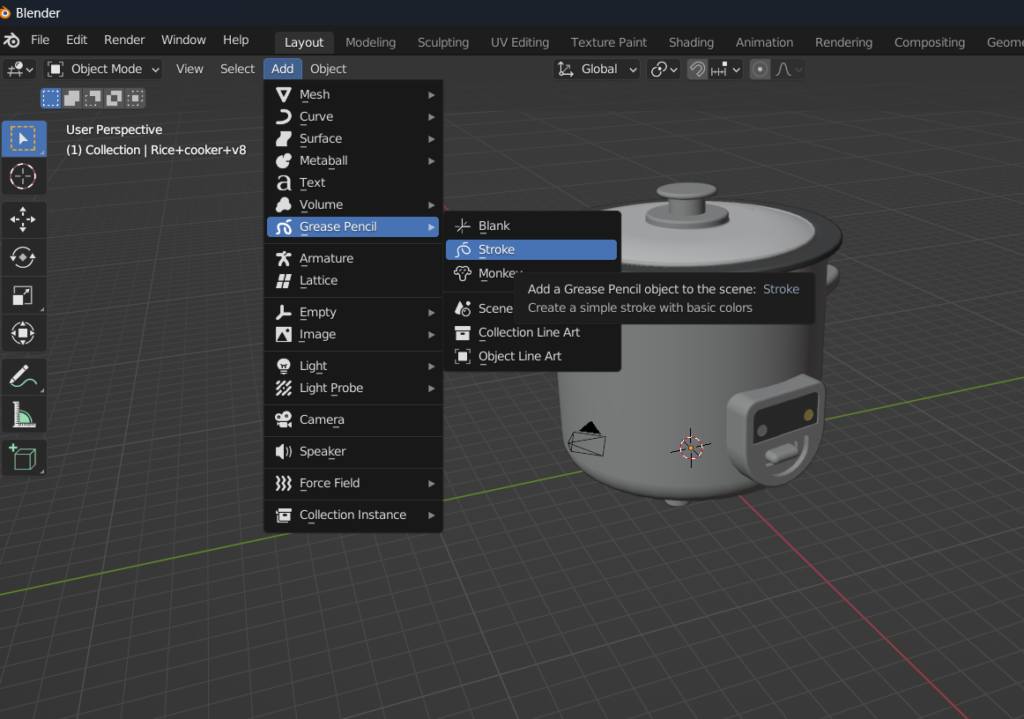
Step 3: Click on Add>Grease Pencil>Stroke
Step 4: Select your grease pencil and click on the tab that looks like a wrench (modifiers tab)
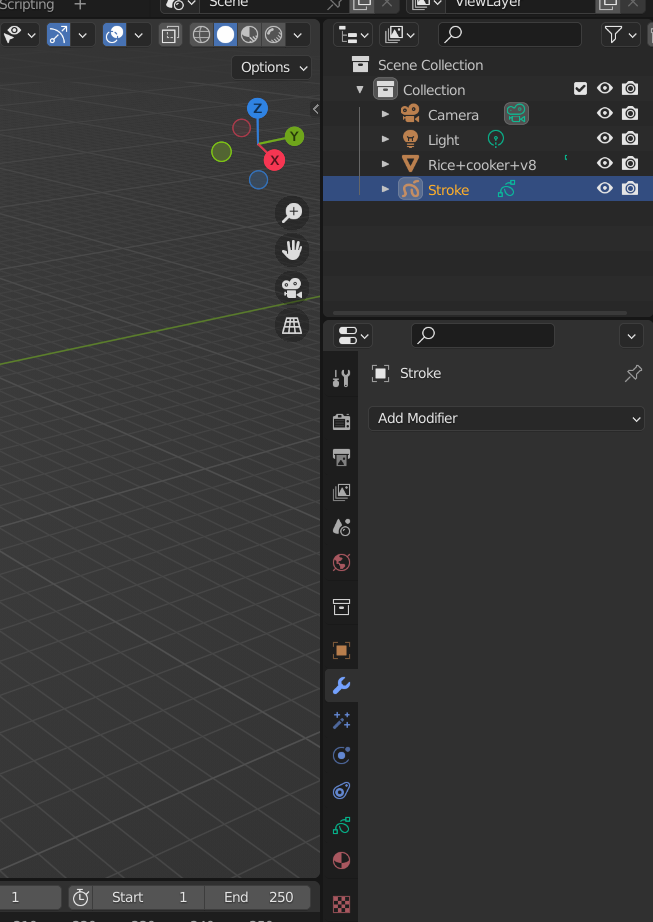
Step 5: Click on “Add Modifier” and under “Generate” click on “Line Art”

Step 6:
Set your:
Source Type to Scene
Layer to Colors
Material to Black.001(or whatever color you want your line)
Line Thickness to whatever looks good on your model
If you can’t see the lineart or only part of the model is lined, you need to zoom out and adjust the viewport camera position. Zoom out with a scroll wheel and then click ctrl+alt+numpad 0 to get the entire model in view.

(optional): If you want to achieve that blank, white line art only look, select your object. Then under materials, set Surface to Emission. You might want to unlink old materials on your object. To do that, go to your object, click on the caret for your object (next to the orange triangle highlighted in the image). Then the caret next to the green triangle right underneath it. On your materials right click and hit “unlink”.

Thats it!
If you’ll like to explore blender here is a link to the documentation
If you’re interested in creating 2D scenes in more hand-drawn style, I recommend this video: Get a Hand-Drawn Sketch Look in Blender – Tutorial
Hi Cynthia, really great work! As a person who has never used Blender, I really like how you gave a step-by-step tutorial on how to apply a lineart onto a 3D model. I like how you show that you can adjust settings like line thickness and color and refine the viewport for better visibility. I also like how you added: “If you can’t see the lineart or only part of the model is lined, you need to zoom out and adjust the viewport camera position. Zoom out with a scroll wheel and then click ctrl+alt+numpad 0 to get the entire model in view.”