During class we explored on how to make a website through WordPress, whilst a useful tool since it gives everyone a foot into the door, as a CS major I find it to be quite restrictive in the way that it works, controls being confusing and all that. AS SUCH I will be giving you all a tutorial on a tool (in CS referred to as a framework) called Bootstrap, which uses a mixture of HTML, CSS and JavaScript, BUT FEAR NOT, you will soon see that this is super easy to use.
The reason this relates to DH is through presentation, bootstrap allows for better visualisation and organisation of data, where one can make different interactive sections that all fit together as a puzzle that one is free to make, for example in my personal website I sometimes write tutorials for things I have built and these follow a specific presentation pattern which I and others I have shown it to quite enjoy.
Tutorial
- Go to a bootstrap template website and look for their free templates, for this tutorial I will be using HTML Codex because I tend to like the ones they have available for free and you do not even need an account!
- Browse through their free selection until you find one that looks interesting, know that you can click on live preview and see a preview of how the website could look an the interactions it will have. For this tutorial I will use the Cental – Car Rent Website Template

- Download it to your computer, it will either download a zip or just a folder, put this folder somewhere where you will remember where it is, you can rename it if you wish, I renamed mine to DGAHFINAL.
- Download and install VS Code
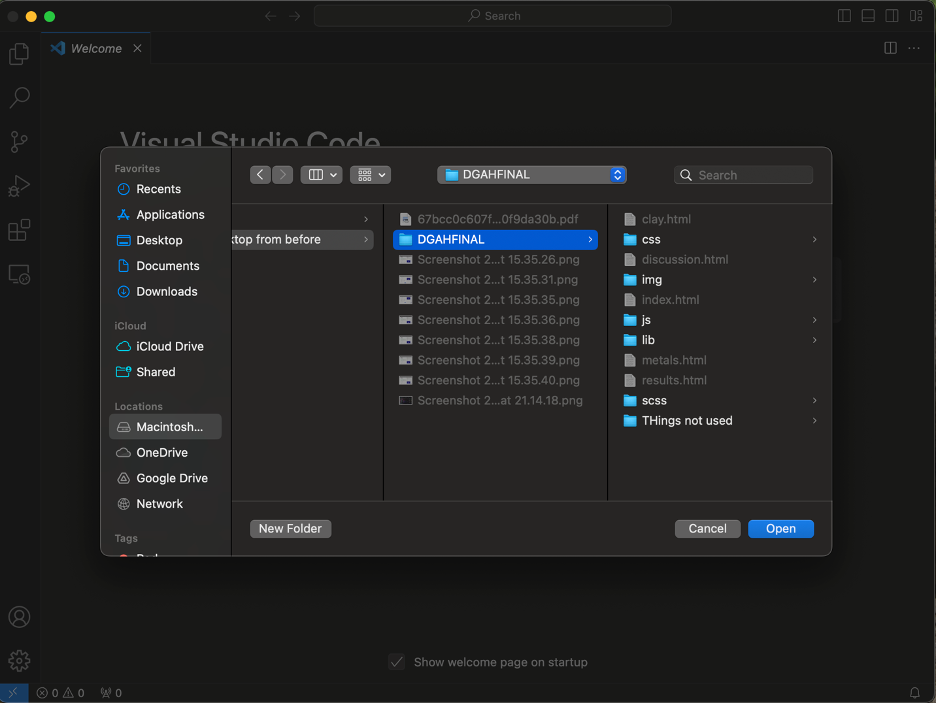
- Open VS Code, go to file and click on “Open Folder” and select the folder that we downloaded from HTML Codex
- OPTIONAL: Download VSCode-Icons, this extension helps more easily see what type of file each file is
- You are now able to edit however you want, because this is supposed to be a tutorial, I will give a brief overview of the things that you might want to look for in the HTML File (I normally only touch this, the CSS and JavaScript are pretty good from the get go, though if you know how to use them then you are welcome to), to be clear tags are the things that go between <> usually followed at the end by a tag that ends like :
- Any <p> tags are blocks of text, so essentially where you would write things in
- Any tags that start with the letter h are heading tags, the general rule is that the further from the number one you go, the less important they are and thus the smaller they are
- Any <img> tags can have the src=”” value modified to whatever you decide, so long as you have the path of the image, if you put all your images into the img folder in the main folder then it is easy because you only have to write src=”/img/” and the last / would be followed by the name of your picture. The alt=”” tag is recommended since this allows to establish an alt text which is useful for visually impaired people
- Bootstrap defines divisions which separate the page into both columns and rows, HTML Codex in particular is good at labelling where the different sections of their pages so that you know where starts what
To end this tutorial below here is a quick run of me modifying the (funnily enough) blog screen of the site that I downloaded at the start, because I want to edit the section where the cars are so that I can show 3D models instead of cars, note that there are more changes that can be made but for the purposes of this tutorial this works. I will also include commentary on why I do the things that I do. A lot of flashing screens will be appearing as I will move kind of fast, so if you are photosensitive, please refrain from looking at this video, hope you enjoy.
Hi This is such a solid tutorial! Bootstrap is definitely a game-changer when it comes to making websites look good without having to write a ton of CSS from scratch. I especially like your explanation about tweaking the HTML without having to mess too much with CSS or JavaScript—your explanation makes it feel way less overwhelming. Also, I love the touch of accessibility with the alt text explanation! Thanks for making this so beginner-friendly!
Hi! This is such a solid tutorial! Bootstrap is definitely a game-changer when it comes to making websites look good without having to write a ton of CSS from scratch. I especially like your explanation about tweaking the HTML without having to mess too much with CSS or JavaScript—your explanation makes it feel way less overwhelming. Also, I love the touch of accessibility with the alt text explanation! Thanks for making this so beginner-friendly!