How to Make a Model
Manual 3D modeling techniques like those we’ve attempted in Fusion360 are very effective and have had a long history of producing impressive digital humanities projects. Lisa Snyder’s long-running project to recreate the World’s Columbian Exposition of 1863 in Chicago is a prime example of what these techniques can accomplish in skilled hands.
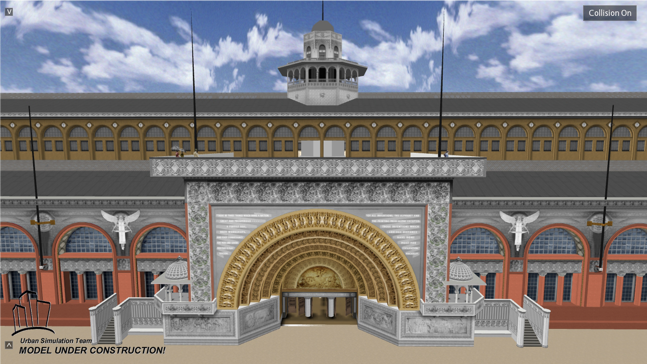
Increasingly, however, computers are doing more of the heavy lifting. There are several methods of generating 3D models that rely on algorithms to create geometric meshes that are being adopted for DH projects along with techniques borrowed from the film and video game industries like motion capture. The award winning Virtual Angkor being a prime example of the leading edge of these techniques.
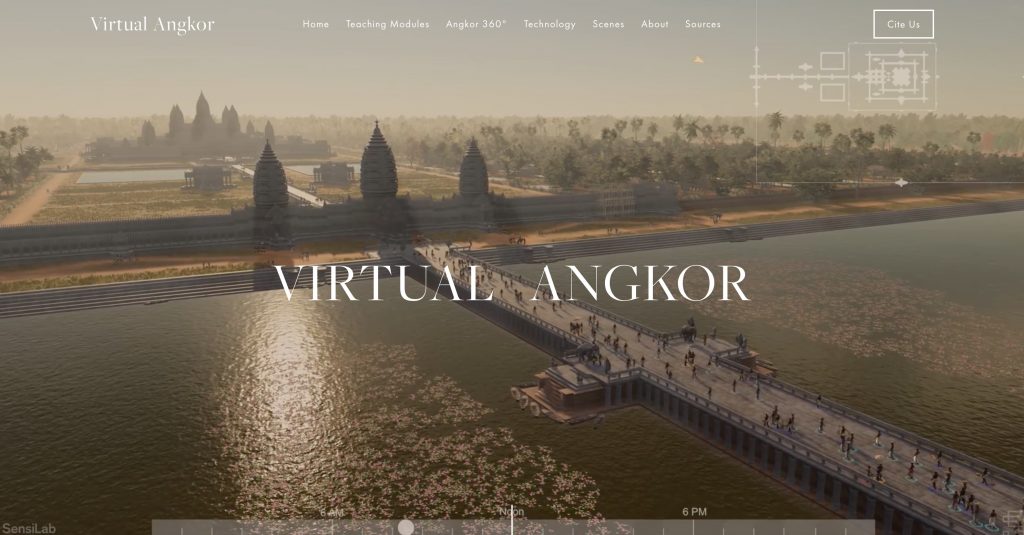
Two major current methods for generating 3D content are procedural modeling and photogrammetry, which we’ll discuss today.
Procedural Modeling
This term refers to the generation of complex geometry from basic shapes through the application of code-based rules. The leading platform for this type of work in DH is CityEngine, owned by ESRI, the makers of ArcGIS. This technique allows a user to produce, modify and update large, textured models of entire cities quickly and iteratively. The output can be explored online or integrated with gaming software or 3D animation packages to produce video games, simulations and movies.
This software was developed for modern city planners and urban architects, but has increasingly been put to use on historic landscapes and built environments, as in the impressive work of Marie Saldaña who developed a Roman temple rule set.
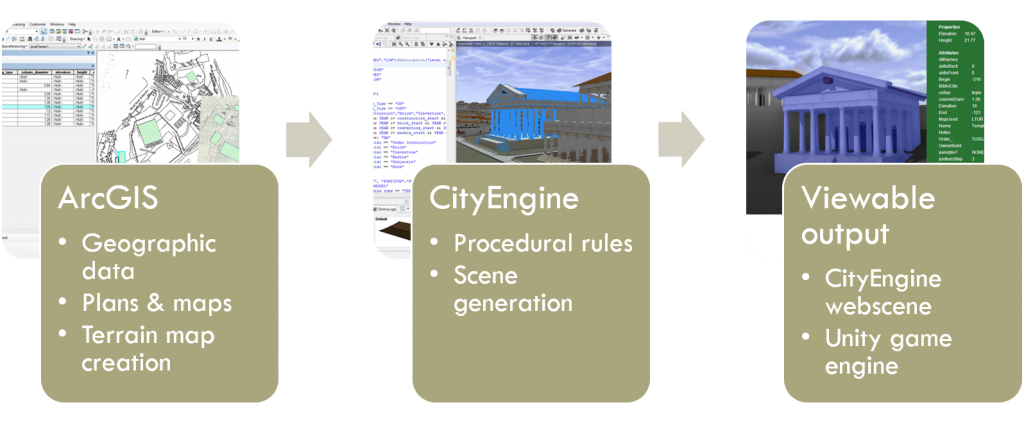
For the past several years, a project here at Carleton led by Serena Zabin and Austin Mason has been using procedural modeling to recreate colonial Boston circa 1770 as part of a video game centered on the Boston Massacre called Witness to the Revolution. You can see a flyover of part of the reconstruction in the video below and read more about the origins and process from Carleton students’ posts on the development blog.
Procedural modeling is very powerful, but we’ve taken the game in a different direction with professional 3D artist support to hand model the city in a sytlized art style, as can be seen on the project website.
Photogrammetry
In the last lab, we introduced photogrammetry as a method for making 3D models of objects. To recap, the basic principle is quite similar to the way many cameras these days allow you to create a panorama by stitching together overlapping photographs into a 2D mosaic. Photogrammetry takes the concept one step further by using the position of the camera as it moves through 3D space to estimate X, Y and Z coordinates for each pixel of the original image; for that it is also known as structure from motion or SfM.
Photogrammetry can be used to make highly accurate and realistically photo textured models of buildings, archaeological sites, landscapes (if the images are taken from the air) and objects. Close range photogrammetry of historical objects offers the possibility of both digitally preserving artifacts before they may be lost or damaged, and of allowing a whole suite of digital measurements, manipulations and other analyses to be performed that allow insights into the material that might not be visible to the naked eye. The technique is gaining in popularity and usage, since it produces very impressive results comparable to high end laser scanning technologies for a mere fraction of the cost.
In-Class Exercise: Continuing your Photogrammetry Adventure
We will continue our work from last time to process the photos into 3D models.
Processing Photos
MetaShape (Mac or Windows)

A demo mode of MetaShape is available for free that will let you try everything except exporting and saving your model. If you want to explore more, they offer a 30-day free trial of the full Standard or full Professional editions, but the software is very expensive after that.
Processing Photos
The main steps in the MetaShape workflow are:
- Add photos
- Align Photos
- Build Mesh
- Build Tetxure
- Inspect and clean
- Export to desired format(s)
Follow the instructions in the tutorial below
For more, Agisoft has excellent tutorials on their website that stay up to date with advances in the software. Here is one for how to build a complete (360-degree) model.
Autodesk ReCap Pro (Windows)

ReCap Photo is a good solution for Windows, as a cloud-based photogrammetry software that is part of the Autodesk suite (along with Fusion360), but can be finicky to install.
- Make sure you are logged into Windows on your lab computer (the software does not work on MacOS)
- Go to the Autodesk Education site, login to your account, and Download ReCap Pro software.
- You’ll also need to download and install the Autodesk Desktop Connector software for Windows
- Make sure the checkbox is checked to also install Recap Photo (see above)
- Launch the Autodesk ReCap Photo software from the desktop (NOT ReCap)
- Sign in top right if not already logged in
Processing Photos
ReCap Photo makes processing easy by handling most of it for you in the cloud. The main steps are:
- Load photos
- Upload to cloud
- Wait for processing
- Download model
- Inspect and clean
- Export to desired format(s)
Follow the instructions in the tutorial linked below:
3D Printing and Fabrication
One of the biggest advances in recent years has been the democratization of 3D fabrication through consumer grade technologies like 3D printers, CNC routers and mills, and laser cutters. These tools allow digital 3D models that were previously only viewable through the imperfect 2D interface of a monitor screen or a 3D Virtual Reality headset to be brought into physical reality fairly easily and cheaply.

In groups: spend 5 minutes exploring one of the following 3D modeling/printing projects below or the Book of Fortresses project I asked you to explore and read about for today:
Designate a reporter and answer the following 4 questions on a stretch of board:
- How do the analog and digital interact in this project?
- What new perspectives does it develop on presentation to diverse audiences?
- What new arguments or interpretations does it advance?
- What new possibilities does it suggest for your future work?
Digitizing Museum Objects
This year, you are all helping launch a new ambitious effort to begin 3D modeling/printing and exhibiting objects from the Carleton archival, library and museum collections. We are going to be digitizing objects in the Archives collection and curating them both digitally (in an online repository like Omeka) and in remediated hybrid digital/physical form as 3D printed solids interpreted through the Museum in a Box project.
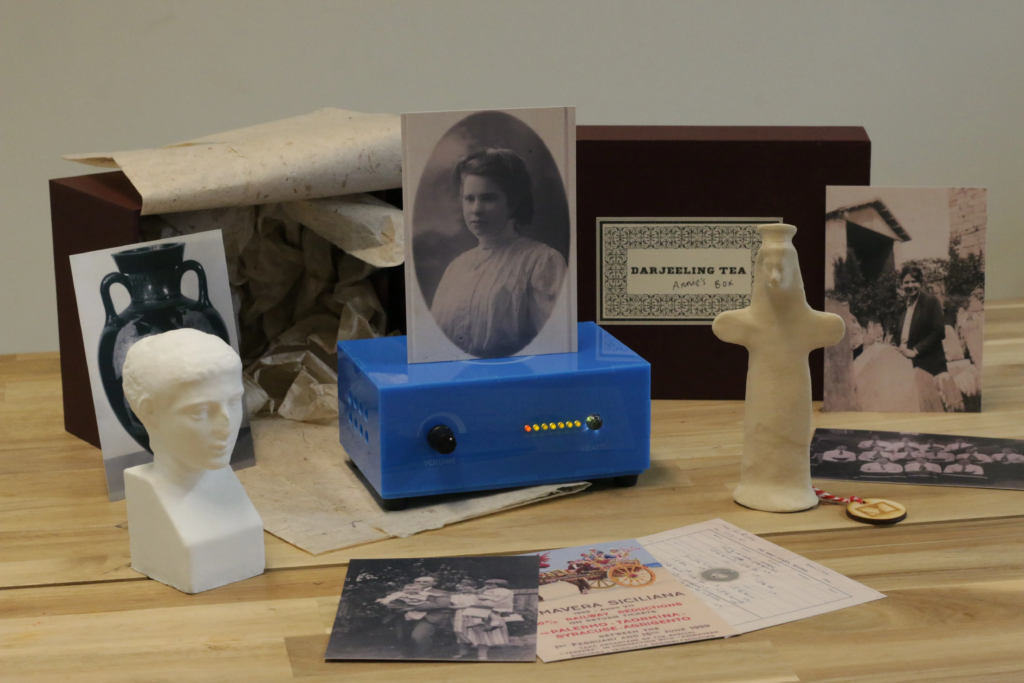
We will experiment with individual components today, and you can consider what you might do along these lines in your future work.
Processing a 3D model for printing
In order to print successfully a 3D model needs to be an entirely enclosed solid. That means it needs to be:
- Watertight (i.e. have no holes)
- Non-zero width (i.e. cannot be a true 2D plane)
- Oriented correctly (i.e. cannot have “reversed faces”)
In addition, the model should be set up with its origin centered, so that the model will import and rotate easily in printers or other 3D viewing/editing software.
There are many ways to clean an STL file, which is the preferred format for 3D printing, that range from free software to very expensive licensed options.
We will be using a dedicated free service from Formware to optimize for printing.
EXERCISE: Optimizing models for printing (Fusion 360)
- Log back into Fusion360 at https://fusion.online.autodesk.com/
- Open your object project from week 1
- Choose File > Export to launch the project viewer
- Download your model as an STL from the menu on the left hand side
Fusion will generate your model and send you an email.
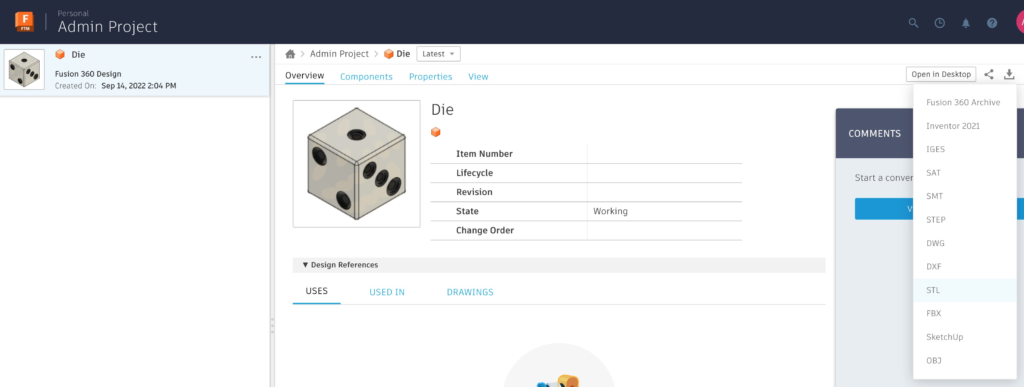
- Download the file by clicking the link in the email
- Click on the file in the Finder or Windows File Explorer and examine the preview. If it looks solid, you should be good

Formware Cleaning
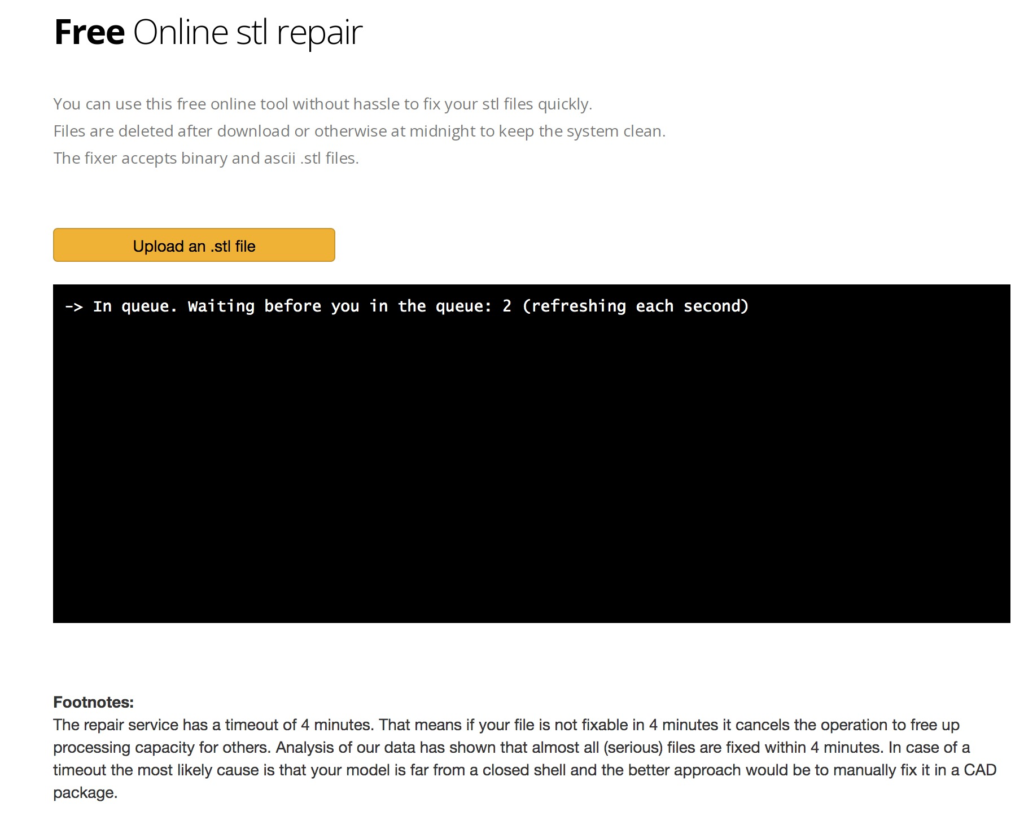
One of the easiest free options to quickly get a clean model for printing: the online Formware service at https://www.formware.co/OnlineStlRepair
- Go to the Formware service, and upload your stl file
- You may need to wait for the queue and the file to process.
- You may need to wait for the queue and the file to process.
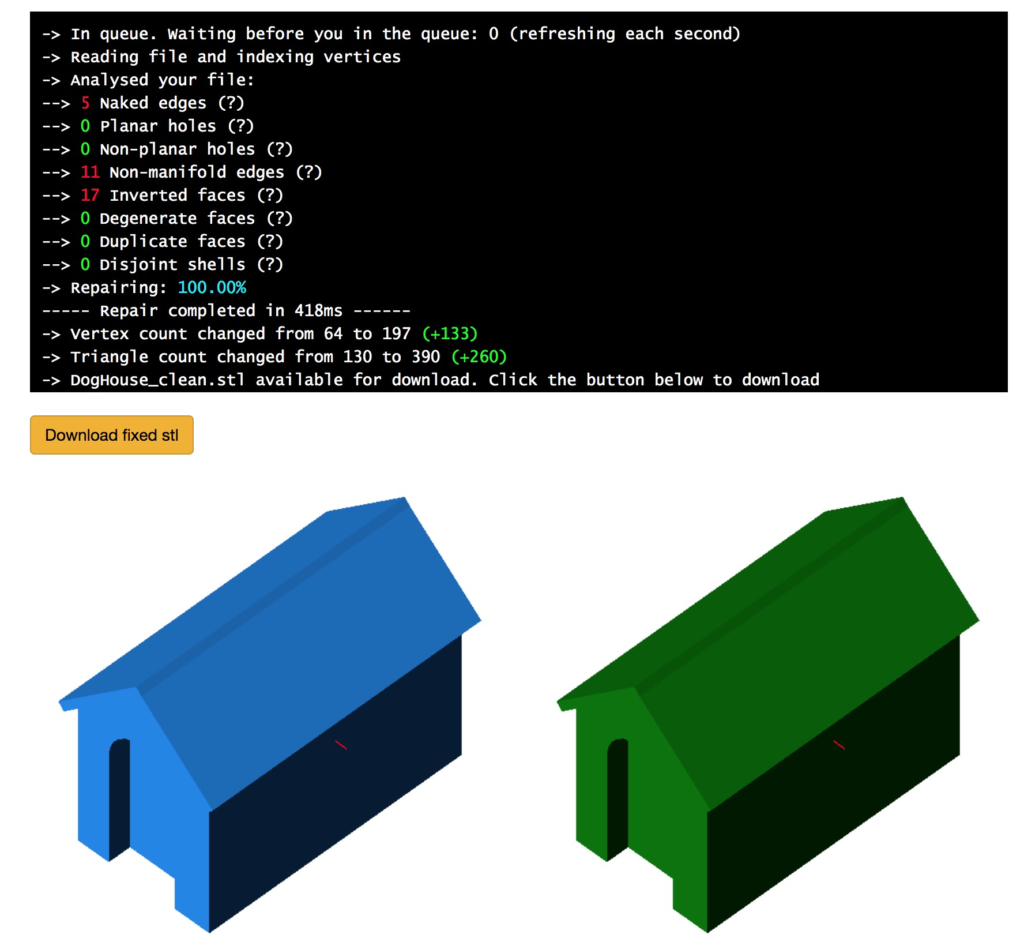
- Download the cleaned and fixed model
- For Fusion360 creations, you probably won’t have a lot of problems, but for models created in SketchUp or other software, or photogrammetry models, you’ll have many more.
- Put the original and cleaned STL file in your google drive folder alongside the image exports
- Save it as LastName_ObjectName.stl and LastName_ObjectName_fixed.stl
e.g. Mason_Die.stl and Mason_Die_fixed.stl
- Save it as LastName_ObjectName.stl and LastName_ObjectName_fixed.stl
In future we will tour the MakerSpace and if you want you can set up a print job to print your model.
Lab Assignment (due Sunday):
Your assignment for this week is to work together on a 3D model of your object and add it to your group’s Omeka item entry. You can find info on your group and object on the object list.
Note: It is recommended that everyone in your group try processing a model, but please submit the files for the one that turns out best.
Download your Photos
- Go to the “Group Object Photos” folder in our shared Google Drive.
- Navigate to your respective set of photos and download them to a folder in your desktop.
- Note the following:
- Make sure your photos are converted from HEIC to .jpg
- You cannot use more than 100 photos in a single ReCap model, so remove any excess photos. It is also recommended to use a minimum of 60 photos, so choose which of your group’s set of photos to use accordingly.
Make a 3D model using photogrammetry
- Use one of the two options above (Autodesk ReCap Photo or Agisoft MetaShape) to process the photos into a photogrammetry model
- Clean up the resulting model as best you can
- Use the Select, Delete, Slice, Fill and other appropriate tools to get a clean model
- See tutorials above and this page for more detailed tips and tricks for editing your model in ReCap Photo
- Set the Scale of the model (if possible) based on the dimensions listed in the object list or its metadata record
- In MetaShape, follow this procedure to set markers and use them to scale the model before export
- In ReCap, use the Scale Tool to set your model to the appropriate dimensions, making sure to set the units to inches or cms to match your data.
- Set the height to the Z axis (or whichever is up) and make sure the others update with the dimensions locked.
- Export your model to get 3 different versions to save in your Google Drive folder
- An OBJ file (for sharing)
- An STL file (for 3D printing), by changing the Advanced “Export as” option to STL
- A GLB file (for online viewing).
- For this, you may need to convert the OBJ file into a gLTF/gLTB file in Blender, following these tutorial instructions
- Save project file (.rcm or .psz) and all exports to your team’s folder in the Common > Archive Objects > Group Object Photos google drive
Process and export any app based models
- If you got a good result from one of the apps (Scaniverse or Polycam), also export the same formats
- An OBJ file (for sharing)
- An STL file (for 3D printing)
- A GLB file (for the web)
- Rename the files to add the app you used for them, e.g.
DillyDuck_Scaniverse.glb - If possible, publish the model to a 3D viewer such as Sketchfab or Polycam’s gallery
Add files to group Omeka Entry
- Log into our Digital Objects of Carleton Omeka, find your group’s item entry, and select “edit” (see the Omeka guide for general instructions on editing Omeka entries).
- Add these new files
- The best OBJ file of your 3D model (plus its .mtl and .jpg or .png material and texture files)
- The best STL file of your 3D model
- The best GLB file of your 3D model
Turn in your assignment
- Finally, submit the following links on Moodle:
- A shareable link to your group’s google folder containing your model files
- Your updated Omeka entry
Specifications
Complete Labs must include:
- In Google Drive folder
- at least one photogrammetry software file
- .rcm Autodesk file and/or
- .psz MetaShape file
- at least 3 3D model export formats (more if including results from multiple methods)
- .obj (plus its .mtl and .jpg or .png material and texture files)
- .stl
- .glb
- at least one photogrammetry software file
- In your group’s Omeka item
- Complete metadata as far as known
- One representative image file
- At least 3 model files
- .obj (plus its .mtl and .jpg or .png material and texture files)
- .stl
- .glb

